Managing Multi-Cloud Infrastructure with Crossplane
Managing multi-cloud infrastructure has traditionally been associated with Terraform, its open-source alternative OpenTofu, Pulumi, or a mix of vendor-specific infrastructure as code (IaC) tools such as AWS CloudFormation or Azure Bicep.
Kubernetes (K8s) has evolved far beyond its original use case as a container orchestrator. All major cloud providers now offer Kubernetes operators that can help you manage your infrastructure resource. Your K8s clusters are able to manage S3 buckets, Azure databases, GCP networks, and everything in between.
These Kubernetes operators are vendor-specific, so for multi-cloud purposes, you need to work with multiple ones. That’s where Crossplane comes in, to be a single solution regardless of the cloud provider.
In this article we will explore what Crossplane is, how it works, and how you can use it for multi-cloud deployments.
TL;DR? Check the video instead:
What is Crossplane and Why does it matter?
If you’ve used any IaC tool, you already understand the appeal of declarative infrastructure. You describe what you want with code, and a tool like Terraform makes it happen. Crossplane takes this idea and applies it from Kubernetes. You install Crossplane in your Kubernetes clusters, then use YAML files to declare your IaC and you deploy your cloud resources as Kubernetes custom resources.
Crossplane uses a reconciliation loop (in the same way that Kubernetes keeps your resources healthy) that ensures your infrastructure converges to the desired state.
In Crossplane there are a couple of key concepts worth noting:
- Providers: Similar to Terraform/OpenTofu providers, these are plugins that interact with your Cloud providers. There are many providers available such as AWS, Azure, and GCP, and each provider has its own set of CRDs that represent the cloud resources they can manage.
- Managed Resources (MRs): These are similar to Terraform resources; individual cloud resources such as AWS VPC, or an Azure Resource Group. Each of these maps 1:1 to a resource in a cloud providers
- Composite Resources (XRs) and Compositions: These enable platform teams to abstract complexity away. You can define a CompositeResourceDefinition (XRD) that exposes a simplified API, and a Composition that maps it to one or more MRs.
- Claims: Namespace-scoped way for team to request infrastructure. With Claims you can trigger the creation of a Composite Resource, which in turn creates the MR.
With Crossplane you can enable a powerful GitOps-native workflow in which your infrastructure definitions live in Git, your cluster reconciles them continuously, and there is no state file.
Note: Not being stateful isn’t necessarily a good thing. At scale, stateful workflows have been proved to work properly for IaC, while there is limited information about non-stateful ones working well at scale.
Setting up Crossplane
You can install Crossplane in any Kubernetes cluster you want. For this example, I will use a minikube cluster, and we will provision resources across two cloud providers: AWS and Azure.
Let’s install Crossplane first using Helm:
helm repo add crossplane-stable https://charts.crossplane.io/stable
helm repo update

helm install crossplane crossplane-stable/crossplane \
 --namespace crossplane-system \
 --create-namespace
You can check the status of the installation by using:
kubectl get pods -n crossplane-system

NAME                                       READY   STATUS    RESTARTS   AGE
crossplane-7b64857b8d-7ztsg                1/1     Running   0          80s
crossplane-rbac-manager-85b5fb85cd-qcsln   1/1     Running   0          80s
Both Crossplane and Crossplane RBAC manager should be in a running state.
Next, install the AWS and Azure providers:
apiVersion: pkg.crossplane.io/v1
kind: Provider
metadata:
 name: provider-aws
spec:
 package: xpkg.upbound.io/upbound/provider-aws-s3:v1.16.0
---
apiVersion: pkg.crossplane.io/v1
kind: Provider
metadata:
 name: provider-azure
spec:
 package: xpkg.upbound.io/upbound/provider-azure-storage:v1.9.0
I’ve saved the configuration from above in a file called providers.yaml. Now, let’s deploy the manifest:
kubectl apply -f providers.yaml
provider.pkg.crossplane.io/provider-aws created
provider.pkg.crossplane.io/provider-azure created
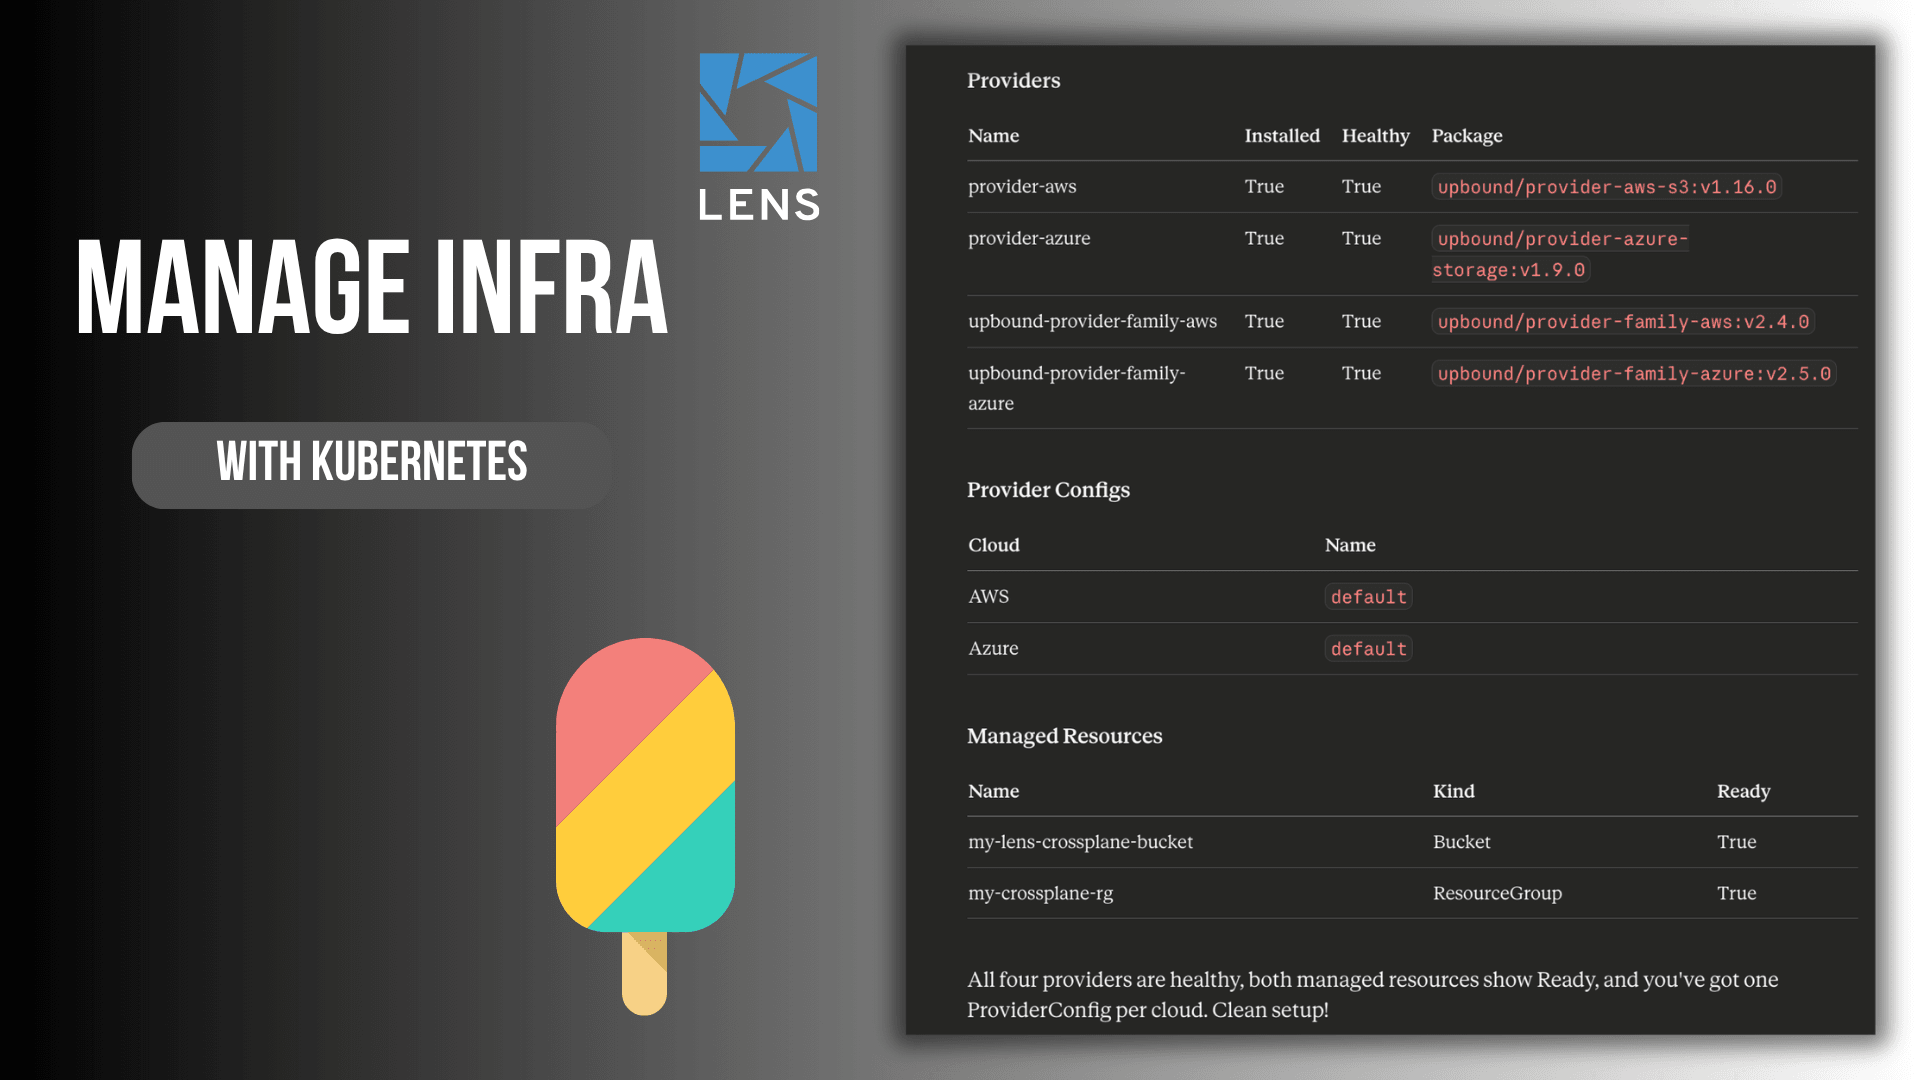
By running kubectl get providers, you should see that your providers are healthy.
Each of these providers needs credentials to interact with its respective cloud. You’ll need to create a Kubernetes Secrets with your cloud credentials, and a ProviderConfig that references it. As a best practice, you should pull these credentials from a secrets management store such as HashiCorp Vault, OpenBao, AWS Secrets Manager, or Azure KeyVault.
AWS setup:
apiVersion: v1
kind: Secret
metadata:
 name: aws-creds
 namespace: crossplane-system
type: Opaque
stringData:
 credentials: |
   [default]
   aws_access_key_id=Your_secret
   aws_secret_access_key=Your_secret
   aws_session_token=Your_secret (this is optional)
---
apiVersion: aws.upbound.io/v1beta1
kind: ProviderConfig
metadata:
 name: default
spec:
 credentials:
   source: Secret
   secretRef:
     namespace: crossplane-system
     name: aws-creds
     key: credentials
For Azure, you will need to create a service principal like so:
az ad sp create-for-rbac \
 --name "crossplane-provider" \
 --role Contributor \
 --scopes /subscriptions/Your_Subscription_ID
Make sure you change the subscription ID to reflect your own. Next, you will receive the following output:
{
 "appId": "...",
 "displayName": "...",
 "password": "...",
 "tenant": "...",
}
You will need to map these values like so for the following configuration:
- appID is the clientId
- password is the clientSecret
- tenant is the tenantId
apiVersion: v1
kind: Secret
metadata:
 name: azure-creds
 namespace: crossplane-system
type: Opaque
stringData:
 credentials: |
   {
     "clientId": "YOUR_SECRETS"
     "clientSecret": "YOUR_SECRETS"
     "tenantId": "YOUR_SECRETS"
     "subscriptionId": "YOUR_SECRETS"
   }
---
apiVersion: azure.upbound.io/v1beta1
kind: ProviderConfig
metadata:
 name: default
spec:
 credentials:
   source: Secret
   secretRef:
     namespace: crossplane-system
     name: azure-creds
     key: credentials
Now that we’ve set up both providers, we are now ready to create some resources. For this example, I will create an S3 bucket and a Azure resource group:
apiVersion: s3.aws.upbound.io/v1beta2
kind: Bucket
metadata:
 name: my-lens-crossplane-bucket
spec:
 forProvider:
   region: us-east-1
 providerConfigRef:
   name: default
apiVersion: azure.upbound.io/v1beta1
kind: ResourceGroup
metadata:
 name: my-crossplane-rg
spec:
 forProvider:
   location: East US
 providerConfigRef:
   name: default
After you apply these resources, you should be able to view them in your cloud provider. These are just some simple examples, and in most cases, if someone is using Crossplane, they will most likely use a Generic CI/CD to deploy their resources, or a GitOps tool like ArgoCD or FluxCD. In some cases, you will see helm charts that deploy parts of the infrastructure leveraging Crossplane, plus parts of the application using plain Kubernetes manifests. These charts are later on used by CI/CD or dedicated GitOps tools.
At scale, things become more complicated.
How do you know what resource you have deployed using Crossplane? It’s very hard to understand what resources have been deployed using Crossplane. You need to run multiple kubectl commands, and this process can be cumbersome. If you are using generic CI/CDs and are deploying hundreds of resources, you will have no visibility whatsoever into what happens. ArgoCD and Flux can help a lot with this, but in some cases, it’s still hard to understand what is actually happening.
Another important question that you should be aware of is what happens if something fails during provisioning? If this happens, you will need to run multiple kubectl commands to debug, and you will get a wall of text as a response.
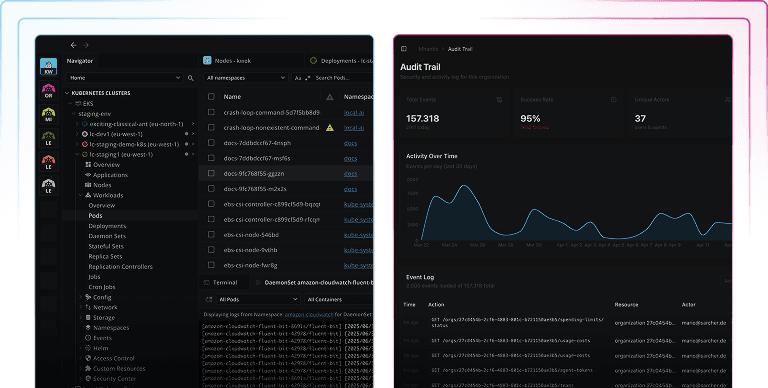
That’s where Lens Kubernetes IDE can help.
Observability into your IaC resources with Lens Kubernetes IDE
Lens Kubernetes IDE supports CRDs by default, so whenever you install a new CRD into your Kubernetes cluster, it will automatically be visible. You can see, at a glance, what is happening with all your Crossplane resources, and have the ability to filter them, without needing to memorize complicated kubectl commands.
By clicking on any MR you get a detailed view of its spec, status, and conditions, clearly laid out rather than being buried in terminal outputs. Crossplane’s status conditions are immediately visible so you can spot a failed resource in seconds rather than minutes.
Lens Kubernetes IDE also has a context-aware AI assistant built in called Lens Prism. With Lens Prism you can ask questions in plain English to understand the status of your resources and it can also help you debug your Crossplane MRs.
Apart from that, Lens just released an MCP server so you can easily understand from your AI assistants everything that is happening in your cluster, including information about your Crossplane resources. You can connect, for example, Claude Code or Claude Desktop to your Kubernetes clusters through Lens K8s and interact with them naturally. Read more about the Lens MCP Server here.
For Crossplane users, this opens up some powerful workflows. Imagine asking your AI assistant:
- Show me all the AWS resources that were provisioned using X Claim
- Are there any Crossplane provider pods that have been restarted in the last 24 hours?
- What MRs are currently not in a Ready state?
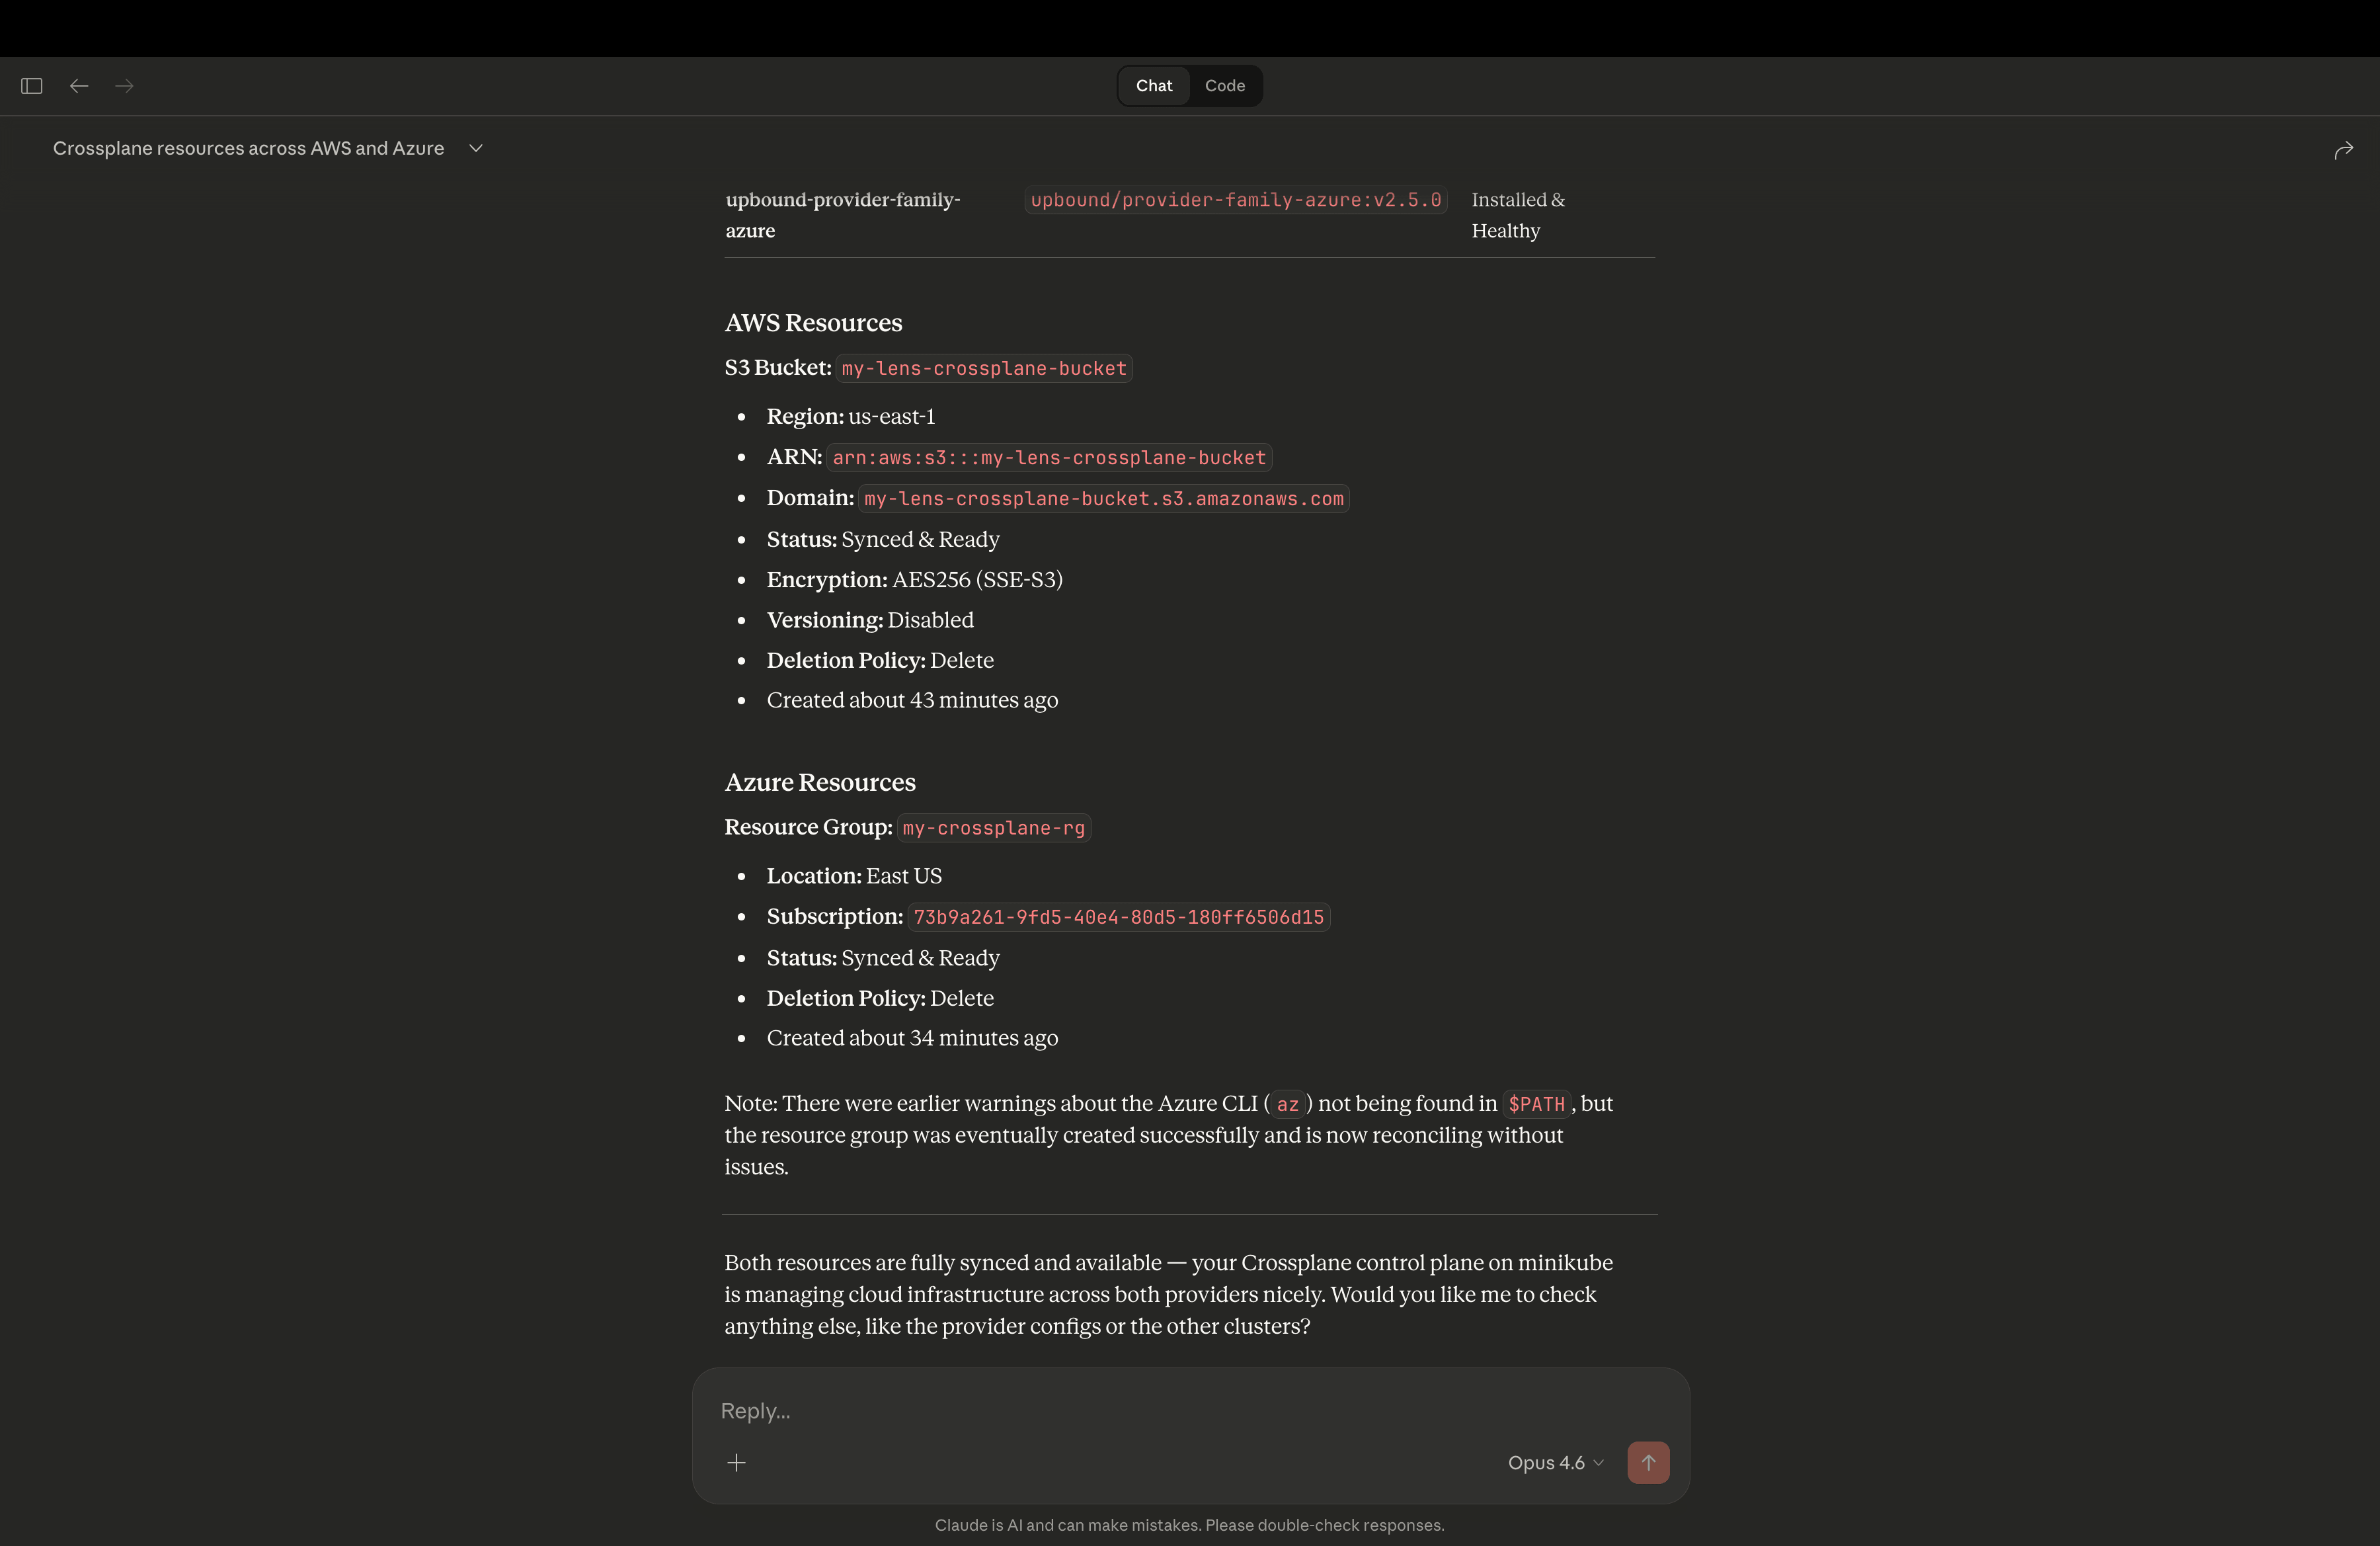
The Lens MCP server will translate these natural language queries into K8s API calls, giving you quick answers with context-switching from your editor, terminal, or your AI Desktop application. This is extremely powerful as you get all the information fast, and you are always on top of the state of your infrastructure.
Conclusion
Crossplane offers Kubernetes the ability to manage your entire infrastructure, but this power without visibility can be a recipe for disaster. You need a way to understand what’s happening, trace relationships, and catch problems early.
Lens Kubernetes IDE provides exactly that, as it transforms your Crossplane infrastructure into a navigable and understandable system. Combined with Lens Prism and the MCP server, you get a workflow that’s both powerful and approachable.
If you want to learn more about Lens Kubernetes IDE, book a demo with one of our engineers.